Dynamically filtered multi-select check boxes
Firstly, my thanks for the inspiration for this to Reza Dorrani in his great video. Please refer to it if necessary for the checkbox gallery insertion process. I am now taking this a couple of stages further with: –
- Dynamic selection of the Checkbox content filtered off a (single select) Radio control.
- Store the radio value in a Text field and the Checkboxes content in a Multi-Choice field.
- Show and modify existing records including a change in the Radio Control content.
- Continue to do all of this with SubmitForm() rather than any Patching.
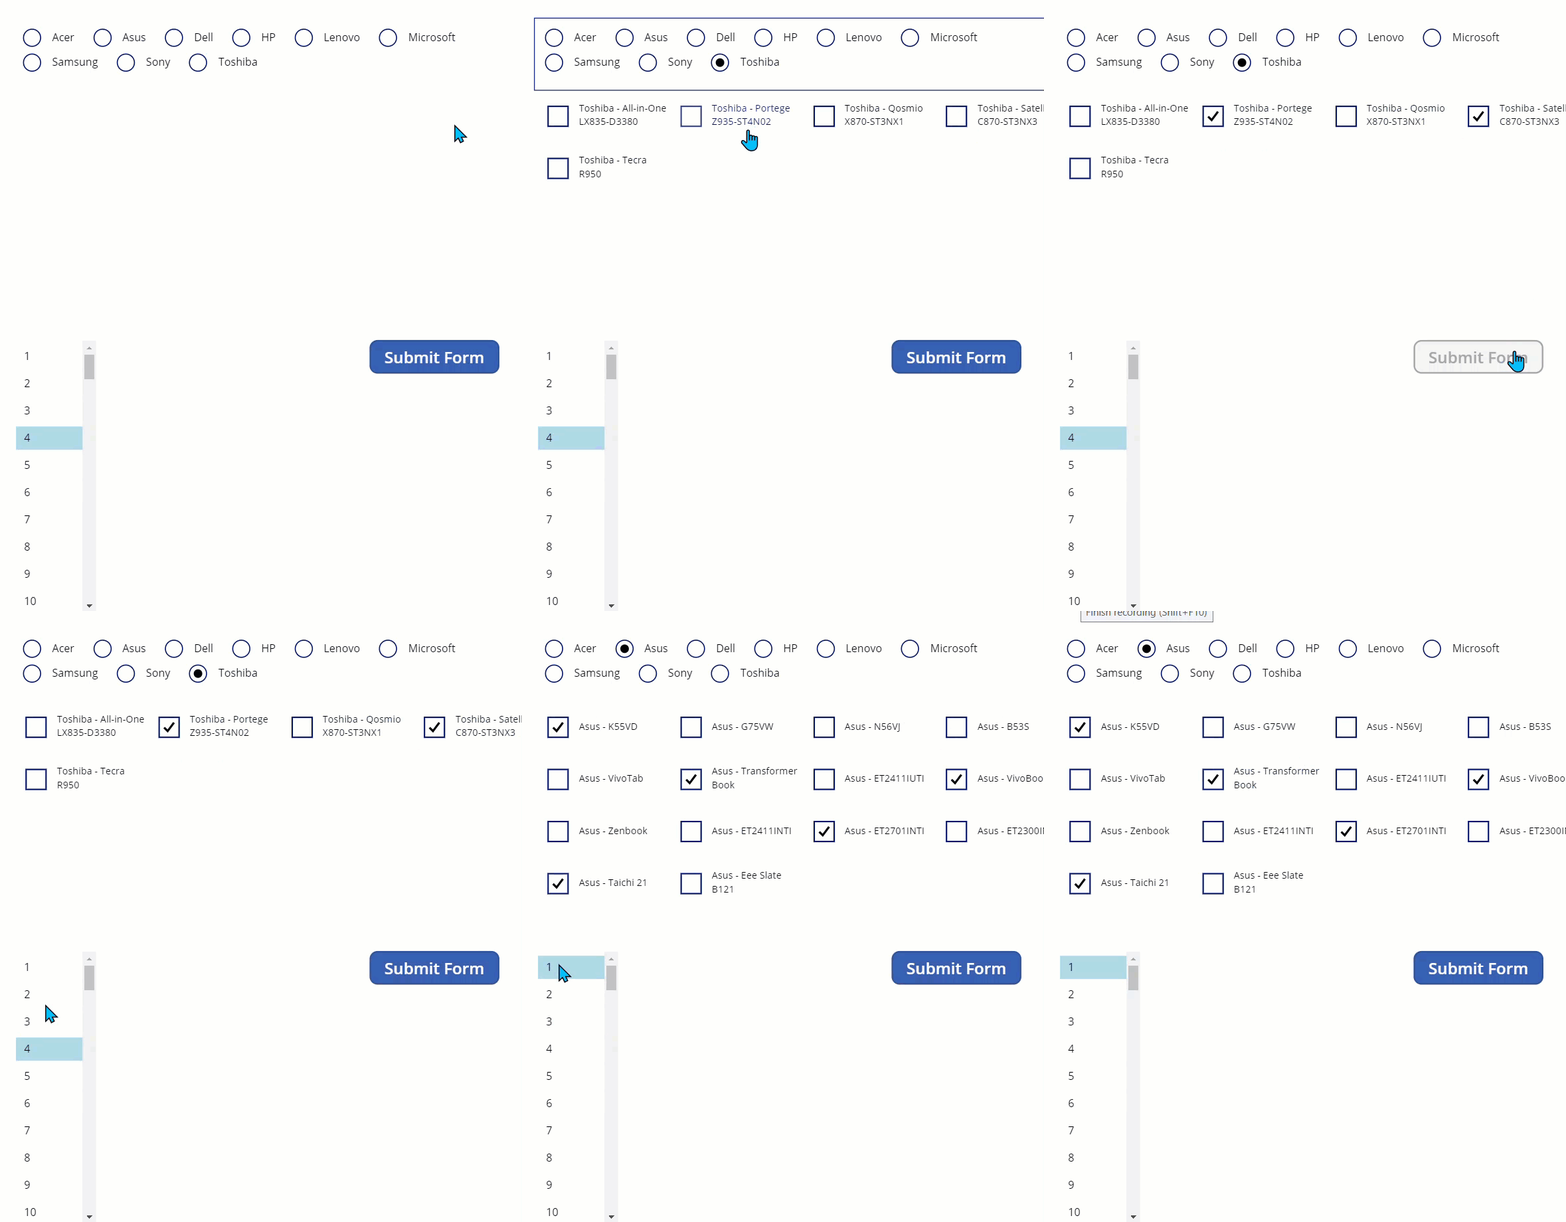
A short example of it working is below

Firstly, if the code seems a little over-complex, it is due to some refreshing issues I had in testing and the below seems to work as intended. It is based off a test list of PC devices, but can be applied to any similar structure.
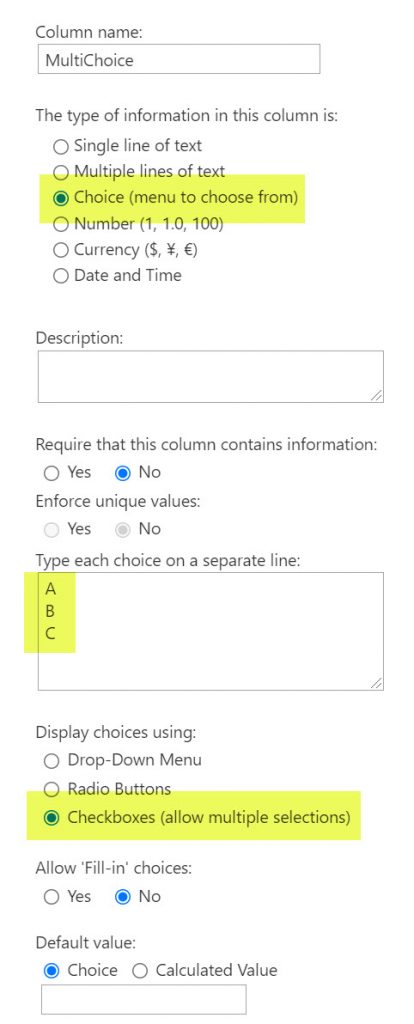
As I mentioned, the primary radio control is stored in a Text field. For the secondary filtered item, create a Choice type column (as below I called mine MultiChoice) and ensure to check allow multiple selections.

The choices can be whatever you want – they will not be used – the “container” is needed to hold the data.
Gallery
Firstly, the gallery at the bottom of the demo is simply to select the record (as you would normally do). The number is the ID, but this is only to show the records present. The OnSelect of the gallery is
UpdateContext({varItem: ThisItem});
ClearCollect(
   colMulti,
   varItem.MultiChoice
)
You would also probably add a navigation to your screen here.
Form
The Item of the Form is: –
LookUp(
   Devices,
   ID = varItem.ID
)
and the OnSuccess
UpdateContext({varItem: Self.LastSubmit});
ClearCollect(
   colMulti,
   varItem.MultiChoice
)
Submit Button
The Submit Form button simply submits the Form.
SubmitForm(frmMultiBoxes)Radio Control
Default – shows the Text field stored in the data source in the relevant Radio button: –
varItem.ManufacturerThe Item – selects the list of values you want to choose from: –
Sort(Manufacturers.Title,Title)but will be whatever you need to show the primary list items.
The Update of this Data Card – writes the selected item value to the Text field: –
rcManChoice.Selected.TitleThe OnChange – important as if another value is selected, any stored values from the second field need to be cleared: –
Clear(colMulti)Multi-Select Check Boxes
Now to the main item – firstly, the DataField of the card in my case is “MultiChoice” – the field created above (which is populated automatically if you insert the card normally).
Next, you need to delete all the controls out of the card and insert a blank Vertical gallery (this is well explained in Reza’s video)
The Items of the gallery here (note I found the pre-filter assisted refreshing): –
With(
   {
      _Devices: Devices,
      _Man: rcManChoice.Selected.Title
   },
   Filter(
      _Devices,
      ManufacturerName = _Man
   ).'Device Name'
)
You will have to apply the list and field names to your model.
Next, insert a Check Box into the gallery with the following settings.
Text (in my model – it will be your field name).
ThisItem.'Device Name'The Default – looks for instances of the value chosen in the Multi-Choice field in the data source: –
ThisItem.'Device Name' in colMulti.ValueAgain this will be the name of the field you are displaying.
Now set the WrapCount of the Gallery (mine is 4) to whatever fits with your field names.
Lastly, the Update of the DataCard with the Gallery in it – writes the Collection to the Multi-Choice field in the data source: –
colMultiThis is a relatively complex process and requires the values above modified to your requirements, but if all steps are followed correctly, you should have a working model.
2 Comments
Ojulu
Would you be kind enough to have a detailed process of how you did it? I have similar request but new to power apps.
Warren Belz
I am not sure how to detail this any more than what is in the blog. Note you will need to apply your list and field names to the examples I have given.